
Our session on the 11th of January was our first session after the holidays. We had time until the 7th to finish our group work and had to upload our edited and subtitled videos until then. This session was held … Continue reading
Tag Archives: learning experience
How to automatically add subtitles in DaVinci Resolve – An easy 10 step guide

This gallery contains 25 photos.
Did you know that there is an easy way to automatically add subtitles in DaVinci Resolve? This is a simple tutorial that will save you a lot of time and energy when editing your videos. You will need: Step 1Open … Continue reading
My Experiences with Video & Audio Editing in DaVinci Resolve
Before taking this course, I already had previous experience with video editing software, including subtitling and working with timelines. However, I had never worked with DaVinci Resolve, which meant relearning the basics, and I was trying to subtitle a video … Continue reading
Some Insights into Konkomba Folktale
My learning experience This semester, I have had the incredible opportunity to be immersed in the captivating world of Konkomba folktales. For most of us in class it was also the first time being confronted with coding a text as … Continue reading
Folktales and language. Why the Wasp Has a Tiny Waist

This gallery contains 5 photos.
After many hours spend working with Visual Studio Code, I was happy to return to learning more about the cultural aspects of folktales. In this blogpost, I want to highlight how folktales help convey cultural and linguistic attributes by working … Continue reading
The Aesthetics of Konkomba folktales
The Konkomba folktales are purely oral in nature, which makes them difficult to access. This is, where the media as a medium comes into play. In our course we help to provide access to the Konkomba folktales, with the means … Continue reading
(Not really) Mastering TEI and XML, a rudimental tutorial

This gallery contains 2 photos.
This post will hopefully help you to get a general understanding of what coding a TEI file in XML language is and what it’s good for. Please note that I am definitely not an expert on this topic, and I … Continue reading
Searching for non existent errors
This gallery contains 1 photo.
Searching for nonexistent Errors The task is fun Should be easily done Fifteen mistakes Waiting to be found Happy to partake I start this round. …….. Going through every line This header looks fine. Searching for errors In this faulty … Continue reading
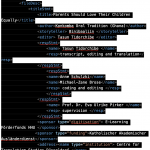
Coding for <term ref=gloss1> blutige Anfänger </term>

This gallery contains 8 photos.
<TEI xmlns=”http://www.tei-c.org/ns/1.0″> <teiHeader> <fileDesc> <titleStmt> <title> Coding for <term ref=gloss1> blutige Anfänger </term> </title> <author> Jule Wolters </author> >/titleStmt> </teiHeader> <text> <body> <div type=”introduction”> <head type=”subTitle”> Introduction</head> <p> Hello everyone! Welcome to my blog entry about our second Coding lesson … Continue reading
Discovering the world of TEI & XML: My first university lesson!
Hey everyone! I just attended my first university lesson on TEI & XML and I must say, it’s not just about codes and brackets. It’s like unveiling a secret language behind digital humanities! Let’s dive in. So, what’s the difference … Continue reading